


If you need to send art files to clients or collaborators, it’s a good idea to include your copyright data within your art file. In this post, I’ll show you how to quickly add this info to your Adobe Photoshop files.
You can add this info to other types of software files, but since the main program I use is Photoshop, that’s what I’m showing you today! It’s essentially the same in Illustrator, too.
Why would you include this information?
We all likely know first hand how files can get lost or disorganized. And when we are working with clients, like in art licensing or other projects, we are sending them high quality/high resolution versions of our original artwork.
Including our names and copyright attribution helps make sure that whoever has access to the file, knows who the original artist or author is, and even what year that file was sent or created.
For example, maybe you are working with a certain person at a company who downloads your art file and saves it to the company’s computer or storage system. Then, let’s say that person leaves the company and someone new comes in.
They may not remember who it was who created the artwork if their files are not organized well. With your name built-in to the file, it ensures that the proper artist credit is in place.
Do I still need to register the copyright for my artwork?
That’s up to you — but I personally don’t register every single one of my own artworks because it would be costly and time consuming. For more details on registering the copyright, see my post How to Copyright Your Artwork here.
Note that I am not a lawyer, and this information is for your educational purposes only and should not be taken as professional legal advice.
Let’s do this! Follow the steps below to add your own info to your files.
Step 1: Navigate to File -> File Info
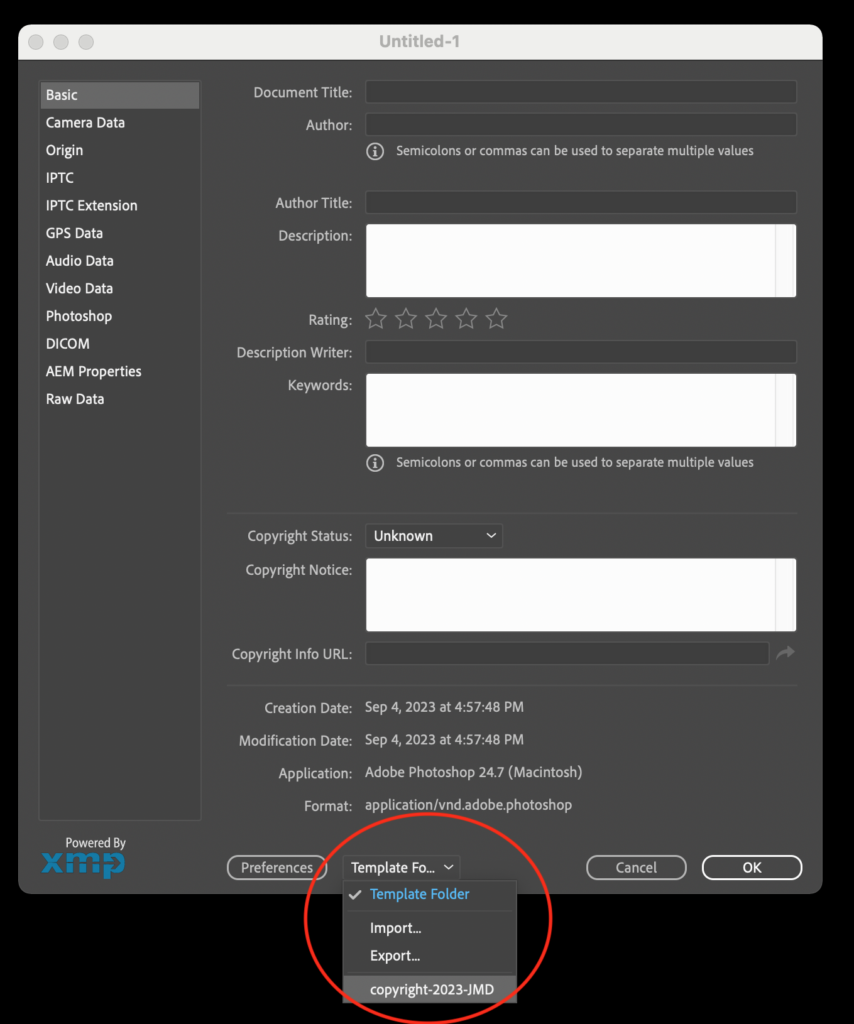
Step 2: Enter Your Details
I fill out Author, Copyright Status, Copyright Notice, and URL, but you can enter as much info as you would like. I keep this more general instead of naming the specific art file / document file, because you can save it as a template to apply to future files.
On a Mac, click Option+G on your keyboard to get the copyright © symbol.

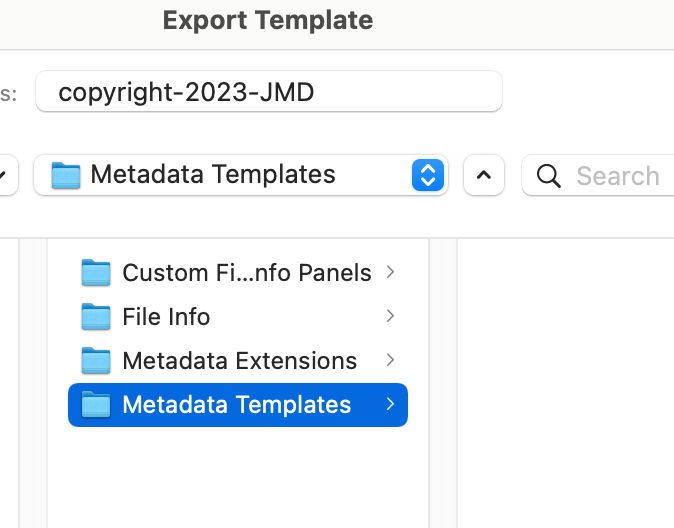
Step 3: Save as a Template
At the bottom of that same window, before you hit OK, select Export and save it to the folder that automatically comes up. I save the file name with the year of the copyright of the template.
Step 4: Use the Template
Here you can see the file name of my template pops up when I open that same window we first opened, in a new file. You can use that template for each future file and edit as needed. You can also save this step as an Action to make the process even quicker (Here is an older but still helpful Youtube video on how to do that).
That’s it!
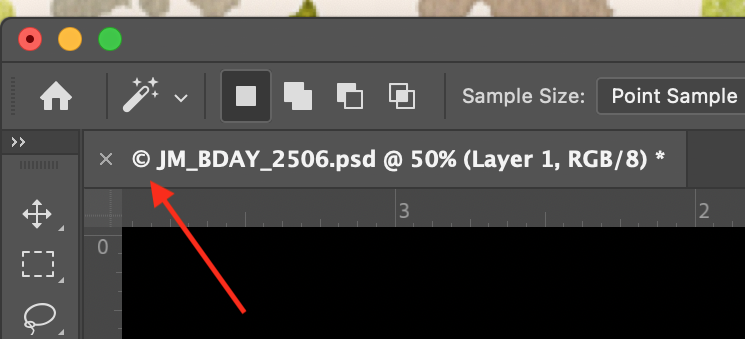
Once you’ve successfully added your copyright info, the symbol will show up automatically within your file name. This indicates to anyone with access to the file that there is copyright data included. Woohoo!
If you’d prefer, here’s a video tutorial walking you through these steps.
Incorporating this process has helped me feel more secure when sending my files out to clients. If you’re looking for even more tips, read my How to Protect Your Art Online post here.


Great tip! thanks for sharing!
So helpful, thanks so much!
Terrific resource (including the link to the add scripts video). Thank you!